This one is one of my all time favorites! I love how its light vs. dark! What a great shot to catch!
Thursday, April 14, 2011
Searching for Beauty
I am always looking for that next best shot. I find that I enjoy taking more photos outside rather then in, so I find fun ways to get out and make every second of my camera's battery life count. Yesterday I went on a bike ride and found some great inspiration just before the storm hit. These are the shots that I took yesterday. **Don't worry I was completely safe and didn't try taking pictures while I was actually riding my bike. I stopped it and then set up for each shot!! I love what I walked away with. Again, I do not edit my shots. All of them are as is! I totally love my Camera!!!!


This one is one of my all time favorites! I love how its light vs. dark! What a great shot to catch!
Tuesday, April 12, 2011
Slacking off - Part Three
Have you ever looked at your walls and felt sad because of how bare they are? I had that moment from the day I was born! I have loved Posters for as long as I can remember! When I was about 16 I got my own bed room for the first time in my life! Usually I've had to share with my older sister. The first thing I did was get a ton of Posters and put them up everywhere!!! Even on the ceiling! Even now that I am married my love of posters is going on strong just in another view. Now instead of buying posters of my Favorite Hollywood hotties or Movies I make my own including photos of my Hubby and Me!! Right after my Hubby and I got married I pulled out my little keepsake box that had all of the movie tickets that we went to see while we were dating, all of the UTA Bus transfers, even special receipts from our movie dates and put them on a poster board along with our first official family photo. It turned out great!!!

4 years later in the summer we had a fun road trip kind of day and went hunting for all the libraries we could find in our area. We ended up getting lost a few times but it was crazy fun! I didn't have my camera with me but thank goodness for cell phones!!! I took out my cell phone and captured some great memories with the camera! With the pictures I took that day I made another poster! Just a few days later we got some free tickets to Resident Evil: Afterlife, but it was a special prescreening and was first come first served and I guess we got there too late and missed getting into see the movie which totally sucked but it was a fun trip out there and back. Again I didn't have my camera but my cell phone is always in my pocket! Took some great shots of us being goofy and added that to the Library Road Trip Day and completed the poster!!! It turned out even better then the first poster I made!!

For Father's Day of 2010 I decided to do something special for my Hubby and I wanted the kids to help. So I bought one of those shirts that come with paint and say "The Worlds Greatest Dad, Hands Down" and you're supposed to put your kids' hands in the paint and then ink the shirt. Well me being the genius that I am thought that this was the best project ever!! So I had my Mom come over to help me and the kids get Daddy's shirt done. Little did I know this was about to go horribly wrong!! It turns out that Cats don't like dipping their paws in wet, cold, funky colored substances. The girls hollered and fussed but over all weren't too bad. Then came Smokey's turn and he freaked out!! Claws, flesh, blood, furr, and paint went everywhere!! My Poor Mom was the one holding Smokey and she got the worst of it!!! I felt horrible! Not to mention now I have to figure out how to get blue paint out of the carpet and off the couch before Doug gets home! The shirt was ruined!! I wanted to cry! I had one day left to get something worked out to where the kids could help but no one would get hurt and nothing would get ruined! So I ran out and bought another shirt but this time it was a grey t-shirt with aged letters that said "Worlds Greatest Dad" I cut out three pictures of the kids in circles and two circles in white cardstock. I got my ink pads out and grabbed the kids! A few minutes later I had exactly what I was looking for! On those white circles I got the two front paws of each kid except Kaliki because she would probably get really sick and that wouldn't be good. I took the pictures and Paw Prints and attached them to the shirt. But I didn't forget about Kaliki! She got a large heart shaped picture on the shirt! I got a poster frame and covered it with metallic green and put the shirt on it! It turned out great and Daddy loved it!!!!

For my Mother-in-Law's birthday last year I decided to give her pictures of our kids! She has been bugging us for pictures of them but I don't like paying to print pictures for people if they aren't going to hang them or use them so I was weary of giving her any but I gave in and made her a mini poster with 4 pictures of out 4 wonderful babes! She hung it on the wall that very same day! Hooray! It was a fun project and I want to make more!

4 years later in the summer we had a fun road trip kind of day and went hunting for all the libraries we could find in our area. We ended up getting lost a few times but it was crazy fun! I didn't have my camera with me but thank goodness for cell phones!!! I took out my cell phone and captured some great memories with the camera! With the pictures I took that day I made another poster! Just a few days later we got some free tickets to Resident Evil: Afterlife, but it was a special prescreening and was first come first served and I guess we got there too late and missed getting into see the movie which totally sucked but it was a fun trip out there and back. Again I didn't have my camera but my cell phone is always in my pocket! Took some great shots of us being goofy and added that to the Library Road Trip Day and completed the poster!!! It turned out even better then the first poster I made!!
For Father's Day of 2010 I decided to do something special for my Hubby and I wanted the kids to help. So I bought one of those shirts that come with paint and say "The Worlds Greatest Dad, Hands Down" and you're supposed to put your kids' hands in the paint and then ink the shirt. Well me being the genius that I am thought that this was the best project ever!! So I had my Mom come over to help me and the kids get Daddy's shirt done. Little did I know this was about to go horribly wrong!! It turns out that Cats don't like dipping their paws in wet, cold, funky colored substances. The girls hollered and fussed but over all weren't too bad. Then came Smokey's turn and he freaked out!! Claws, flesh, blood, furr, and paint went everywhere!! My Poor Mom was the one holding Smokey and she got the worst of it!!! I felt horrible! Not to mention now I have to figure out how to get blue paint out of the carpet and off the couch before Doug gets home! The shirt was ruined!! I wanted to cry! I had one day left to get something worked out to where the kids could help but no one would get hurt and nothing would get ruined! So I ran out and bought another shirt but this time it was a grey t-shirt with aged letters that said "Worlds Greatest Dad" I cut out three pictures of the kids in circles and two circles in white cardstock. I got my ink pads out and grabbed the kids! A few minutes later I had exactly what I was looking for! On those white circles I got the two front paws of each kid except Kaliki because she would probably get really sick and that wouldn't be good. I took the pictures and Paw Prints and attached them to the shirt. But I didn't forget about Kaliki! She got a large heart shaped picture on the shirt! I got a poster frame and covered it with metallic green and put the shirt on it! It turned out great and Daddy loved it!!!!

For my Mother-in-Law's birthday last year I decided to give her pictures of our kids! She has been bugging us for pictures of them but I don't like paying to print pictures for people if they aren't going to hang them or use them so I was weary of giving her any but I gave in and made her a mini poster with 4 pictures of out 4 wonderful babes! She hung it on the wall that very same day! Hooray! It was a fun project and I want to make more!
Slacking off - Part two
I love making cards. All kinds of cards, all sorts of cards, all types of cards! Cards! Cards! Cards! Cards! And more Cards! Mwahahaha!!!! The first one I am going to show you is from Christmas of last year. My friend Rebecca made this very cute Rudolph card and I just fell in love with it!! So I decided to try making one of my own and loved the results so much that I did an entire line of what I call Buttons for Christmas cards!! Rebecca is so inspireing, she has such a bubbly attitude about everything and loves showing you new and fun ways of doing things! She's so fun! =) Well here are the pictures of my Buttons for Christmas
!

Thanks Becca for your Inspiration!
Next up is my Easter Card to my wonderful Easter Bunny! I love BIG cards, weather they are 3 fold of just giant poster sized! I just love BIG cards! This was my very first three fold card. It turned out super cute!! I didn't print out a bunny face, I didn't cut a bunny face out of a book, I picked up my favorite mechanical pencil that my Mom bought for me when I was in 8th grade and I drew the bunny face that I wanted to see on that card! I colored it with my faithful colored pencils! It turned out great! I found some big googly eyes that moved and added them to the bunny for character. Then I found some brown cardstock and cut it down and glued it onto the back of the bunny and added a white cardstock puffy tail!!! But the card was still missing something, so I dug into my scraps bin for some easter left overs and found this cute egg and it just completed the card. It Turned out amazing!! My Hubby loved it!! Then again he always loves what I make him! =) **Such a great Husband!


One of my all time favorite cards that I ever made was for my friend Kassie who worked at Kmart with me. She was leaving and I wanted her to know that I was going to miss her!! So I took some time and decided what I really wanted the card to be and to look like. Flowers are great on any card for any occasion! So I went with flowers and letter stamps saying Miss You. **I really do still miss Kassie! I picked some of my favorite cordinating colors and by the end of two hours I had an amazing card that everyone loved!! Also, at the ribbon I added a tag that said friends and attatched it with a safty pin. Super Cute! It was such a fun but sad project!

Inside the card because I used dark brown carstock I cut strips of white paper for my personal writing to her. And I added more Miss You Flowers!
!Thanks Becca for your Inspiration!
Next up is my Easter Card to my wonderful Easter Bunny! I love BIG cards, weather they are 3 fold of just giant poster sized! I just love BIG cards! This was my very first three fold card. It turned out super cute!! I didn't print out a bunny face, I didn't cut a bunny face out of a book, I picked up my favorite mechanical pencil that my Mom bought for me when I was in 8th grade and I drew the bunny face that I wanted to see on that card! I colored it with my faithful colored pencils! It turned out great! I found some big googly eyes that moved and added them to the bunny for character. Then I found some brown cardstock and cut it down and glued it onto the back of the bunny and added a white cardstock puffy tail!!! But the card was still missing something, so I dug into my scraps bin for some easter left overs and found this cute egg and it just completed the card. It Turned out amazing!! My Hubby loved it!! Then again he always loves what I make him! =) **Such a great Husband!


One of my all time favorite cards that I ever made was for my friend Kassie who worked at Kmart with me. She was leaving and I wanted her to know that I was going to miss her!! So I took some time and decided what I really wanted the card to be and to look like. Flowers are great on any card for any occasion! So I went with flowers and letter stamps saying Miss You. **I really do still miss Kassie! I picked some of my favorite cordinating colors and by the end of two hours I had an amazing card that everyone loved!! Also, at the ribbon I added a tag that said friends and attatched it with a safty pin. Super Cute! It was such a fun but sad project!

Inside the card because I used dark brown carstock I cut strips of white paper for my personal writing to her. And I added more Miss You Flowers!
Slacking Off
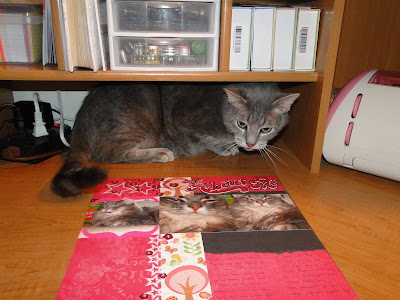
WoW! I just can't believe how much I have been slacking off on this blog! You better sit back and get comfy because this one is gonna be a long one! =) I will start with my wonderful Scrapbook pages. Most of my amazing scrapbook pages are out of my Kids' album because they are so fun and crazy! Not to mention I don't have too many photos of my Hubby and me. One of my Favorites of all times is for my second youngest Daughter Tia. This is the story of the page, I was walking through one of my favorite craft stores with a 20$ gift card I had gotten for Christmas and I saw this very cute "All About Me" 3 piece sticker set. Now normally I wouldn't I wouldn't spend 4$ on a sticker set no matter how cute it is, but when I saw it I could think of nothing but my little girl. Not to mention she doesn't have many pages where its just her. Usually she is with her big brother or sister. So feeling that I just had to have these stickers I didn't waste another second thinking about it, into the cart it went and off I went to look at dollar stamps. When I got home and started putting everything away I found this cute sticker set again and right in the middle of putting everything away I rushed to my scrapbooking corner and started pulling out paper and glue and pictures. I was so inspired! **Good thing I didn't have any groceries with me on that trip. =) My oldest, my son Smokey came to help make sure that things were coming together nicely. He is always close by when it comes to Scrapbooking. I love that my babes help me with my favorite hobby! Well about 20 minutes later I had this beautiful 12x12 Scrapbook page of my sweet little Tia!
I am what most people would call the dollar store Scrapbooker. I love finding the best deals on the products I use the most. Most of my clear stamp collection is from the dollar section. I have never paid full price at a store for a stamp set. Ever! **I must admit though that I did have to pay full price the few stamps I ordered from Stampin Up. I always look for the sales and the clearance. It never bothers me that I have last seasons paper or embellishments. I love reading back issues of my Paper Crafts Magazine at the local library. That's actually what inspired me to make the next page that I am going to show you. I was flipping through a Creating Keepsakes back issue from about 3 years ago and saw these adorable stamps that were hearts, stars, and moons with little bear faces and night caps. I loved them!! They were so cute. Well, knowing that they would not be on some dollar rack somewhere I decided to try to make my own! I cut out stars of different sizes and sat down with a pencil and eraser and drew up some very cute little bear faces and night caps. I colored them in with colored pencils and a black Sharpie. AMAZING!!! Then I pulled out a white piece of paper and took my pencil and eraser again and drew up the moon!!! To die for!!!! Colored it in as well with the colored pencils and then went through my 12x12 paper stash to find the perfect background to lay my new sleepy stars and moon on. Found the perfect one! Grabbed my pictures and went at it. About 10 minutes later I had this amazing layout finished and looking too cute for words! This layout has my beloved second oldest, first daughter Valentine!

Ok, one more page for you! This one is titled the Toy! I found this toy out side our apartment. One of our Neighbors was getting rid of it because their cat never played on it. So I took it cleaned it thoroughly and let it dry then let my three oldest have a turn on it! They loved it!! My second youngest, Tia loves it the most! She can always be found playing and laying on it. It was such an amazing find for free. I had been looking into similar items at walmart and such and the prices always made me worry. 20-40$ for these plastic little things that don't look like they could hold more then 2 pounds. So I was all for trying it out for free! =) Gotta love a great deal! Ha Ha Ha Well of course when you get a new toy for your children you just have to break out the camera and get tons of pictures! These are just a few of the ones I got when my two babes were playing on it! Valentine was so afraid of this new toy for close to three weeks then she started sleeping on it! Oh and by the way, the bird that is under the title I cut and inked myself! Its amazing what a piece of paper and a pencil can do for you!

And just to clear things up, I am the very proud Mother to 4 beautiful Children. 3 Amazing kitty cats named; Smokey age 10, Valentine age 5, and Tia age 3. And one beautiful Gerbil named Kaliki. There have been others but that is a blog for another time.
I am what most people would call the dollar store Scrapbooker. I love finding the best deals on the products I use the most. Most of my clear stamp collection is from the dollar section. I have never paid full price at a store for a stamp set. Ever! **I must admit though that I did have to pay full price the few stamps I ordered from Stampin Up. I always look for the sales and the clearance. It never bothers me that I have last seasons paper or embellishments. I love reading back issues of my Paper Crafts Magazine at the local library. That's actually what inspired me to make the next page that I am going to show you. I was flipping through a Creating Keepsakes back issue from about 3 years ago and saw these adorable stamps that were hearts, stars, and moons with little bear faces and night caps. I loved them!! They were so cute. Well, knowing that they would not be on some dollar rack somewhere I decided to try to make my own! I cut out stars of different sizes and sat down with a pencil and eraser and drew up some very cute little bear faces and night caps. I colored them in with colored pencils and a black Sharpie. AMAZING!!! Then I pulled out a white piece of paper and took my pencil and eraser again and drew up the moon!!! To die for!!!! Colored it in as well with the colored pencils and then went through my 12x12 paper stash to find the perfect background to lay my new sleepy stars and moon on. Found the perfect one! Grabbed my pictures and went at it. About 10 minutes later I had this amazing layout finished and looking too cute for words! This layout has my beloved second oldest, first daughter Valentine!
Ok, one more page for you! This one is titled the Toy! I found this toy out side our apartment. One of our Neighbors was getting rid of it because their cat never played on it. So I took it cleaned it thoroughly and let it dry then let my three oldest have a turn on it! They loved it!! My second youngest, Tia loves it the most! She can always be found playing and laying on it. It was such an amazing find for free. I had been looking into similar items at walmart and such and the prices always made me worry. 20-40$ for these plastic little things that don't look like they could hold more then 2 pounds. So I was all for trying it out for free! =) Gotta love a great deal! Ha Ha Ha Well of course when you get a new toy for your children you just have to break out the camera and get tons of pictures! These are just a few of the ones I got when my two babes were playing on it! Valentine was so afraid of this new toy for close to three weeks then she started sleeping on it! Oh and by the way, the bird that is under the title I cut and inked myself! Its amazing what a piece of paper and a pencil can do for you!
And just to clear things up, I am the very proud Mother to 4 beautiful Children. 3 Amazing kitty cats named; Smokey age 10, Valentine age 5, and Tia age 3. And one beautiful Gerbil named Kaliki. There have been others but that is a blog for another time.
I just Love Spring!
I just love spring and I enjoy doing Spring crafts such as making flowers and putting together the base pages for easter pictures or march, april, and may birthdays!! This year wasn't any different. I made those fun blue flowers for Autism Light it up Blue, and I also made 24 Thank You cards!! Here are the pictures I have from the thank you cards.

Wednesday, April 6, 2011
Light it Up Blue
This month is World Autism Awareness Month and I have a very beautiful Niece with Autism and I wanted to show her support so I made these beautiful Blue and White Flowers for her. They were an easy project and so fun to make! I hope that they inspire you to create your own ways to Light it Up Blue for Autism!
Saturday, March 19, 2011
To be very Honest!
Being honest in a business is really what people are looking for! I recently made a delivery of 24 cards to a customer and collected payment for the cards. Two days later I discovered that I forgot to give her two of the cards she ordered and I didn't add bows to 6 of the cards! I feel very horrible about this so to make it up I am giving her 6 new and free cards, Easter & spring cards, a father's day card, a very cute "You're Perfect" card, and a best wishes card! Now, this does not fix it! I know, but it is a really good start. The cards turned out great!! She will also be receiving the two cards that I forgotten to give her and I will go to her house and fix the cards that have the missing bows! I am very sorry for everything and I hope to see her continuing business!


Subscribe to:
Posts (Atom)